Traffic-Lights for Jira Cloud
- Frank Polscheit (PSIT)
In addition to Jira's standard fields, you can use a set of free configurable traffic-light fields, now. They are globally available for all your issues.
The Atlassian cloud environment differs technically much from Jire server/onpromise. As consequence, third-party add-ons have to take about that limitations and you cannot create e.g. a listener for an add-ons. Add-ons are provided as Software-as-a-Service (SaaS) running within your browser and on the vendors infrastructure, generally. In case of this add-on, none of your data is transferred outside your browser and the Atlassian hosting platform to secure your data privacy and security!
Also have a look at:
As admin: Create and configure or delete traffic-light fields
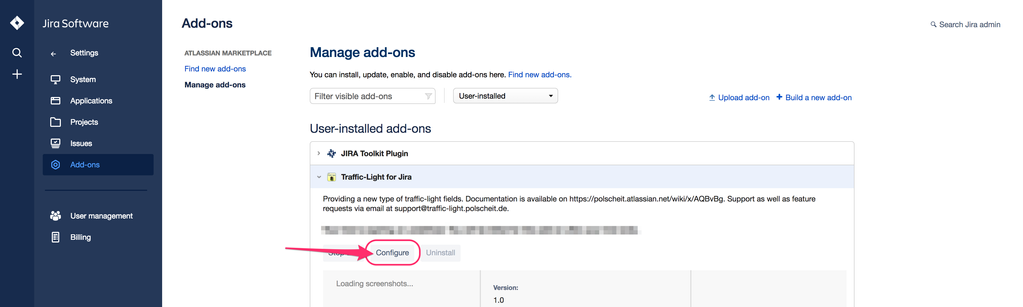
Please switch into "Settings" → "Add-ons" → "Manage add-ons", scroll to section "Traffic-Light for Jira", open it and click on "configure".
Active Fields
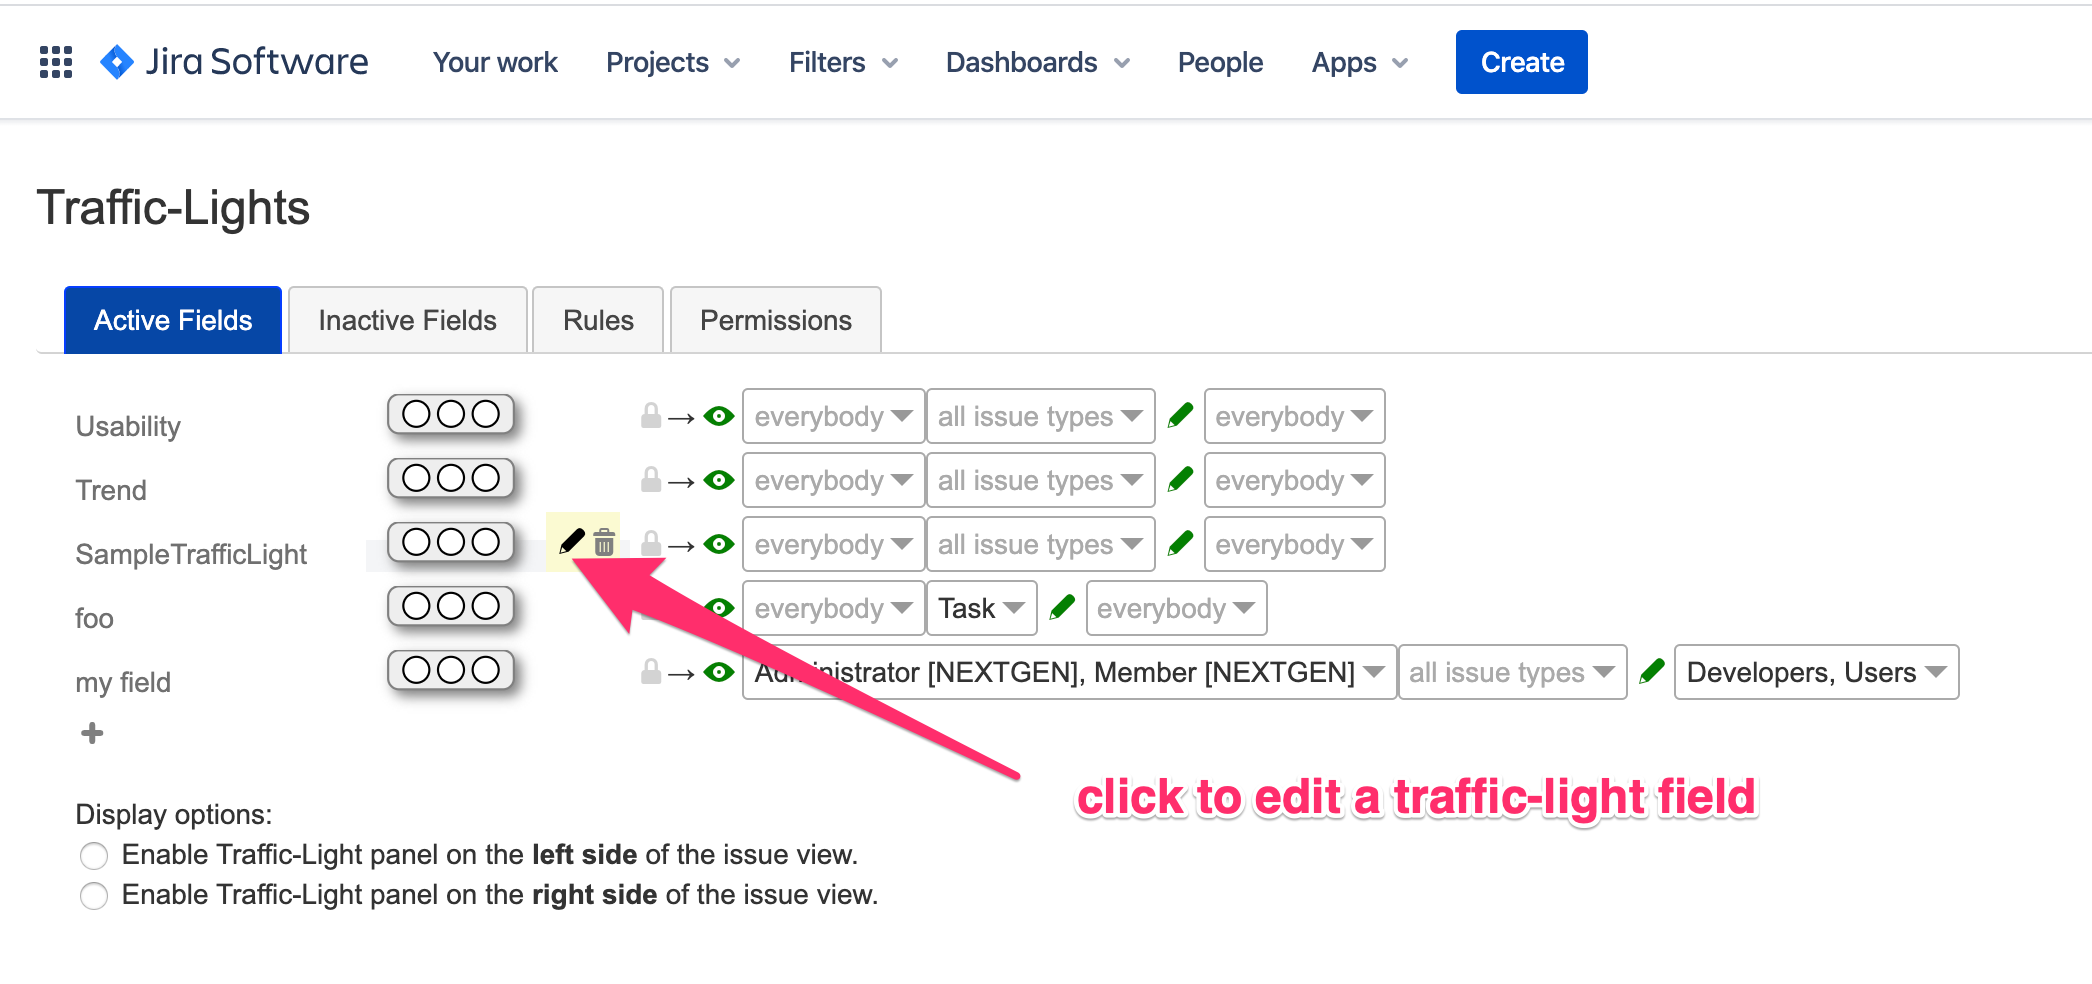
Clicking on "configure" shows the Administration panel's default tab "Active Fields":
- click on [+] to create a new field
- move mouse over an existing field to see a trash icon: click on it to remove field from active traffic-lights (it will be displayed as inactive field and can be reverted without loss of data → undo)
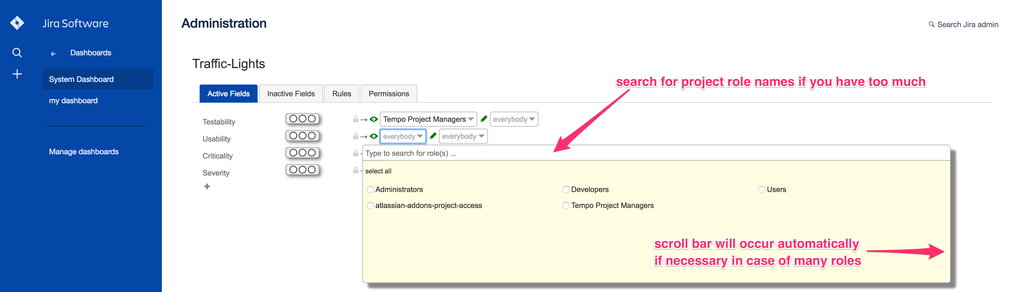
- click on the select box after the eye/view icon to specify which project roles are allowed to see the related traffic-light field
- click on the select box after the pencil icon to specify which project roles are allowed to edit / change the content of the related traffic-light field

Single field permissions for view or edit are limited to project roles only. But a project role can contain multiple users as well as user groups. So, this concept is very flexible and can vary per project whereas the traffic-lights are global.
Additionally, you can restrict viewability to certain issue types, only:
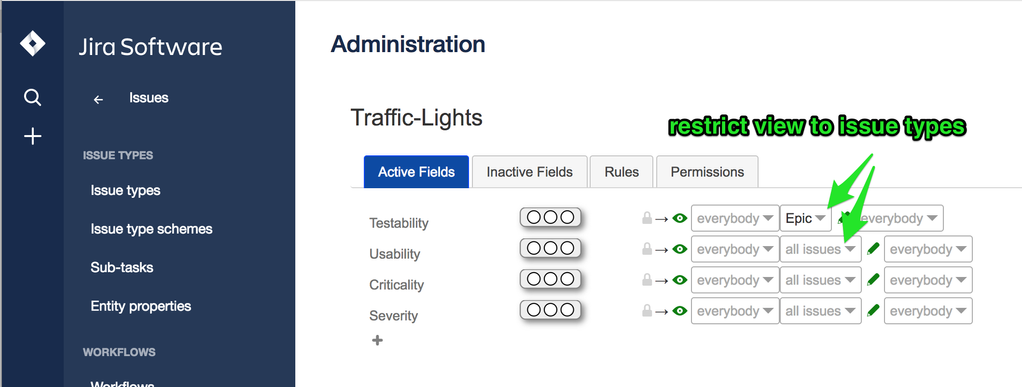
You have to specify all issue types, you want to allow for displaying the related traffic-light. On issue screens of other issue types, that traffic-light will not be displayed.
Inactive Fields
Having remove an active field, it will not deleted but shifted into "inactive fields" so that you can revert/undo your action.
If you click on the trash icon, you will finally delete the related field.

Rules for automatiion
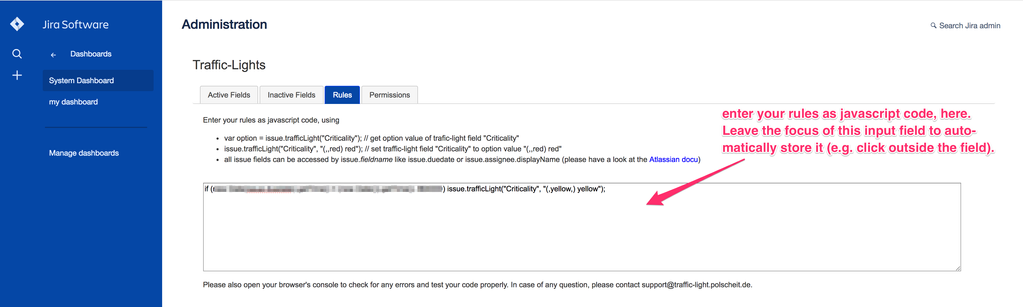
That rules, coded as javascript, will be executed for an issue each time a user views that issue, only. That different from a background task being triggered by a webhook!
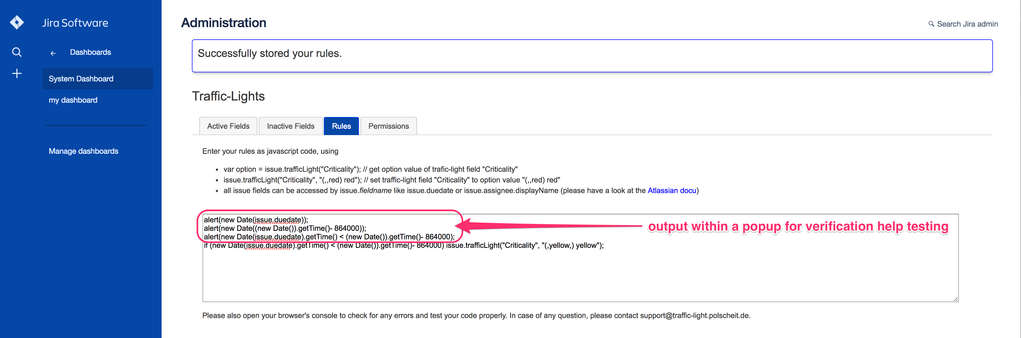
Within the sample above, the traffic-light field "Criticality" is set to "yellow" if previous date (being: current date - 1 day = current date - 86400000 millisec.) is greater than due date.
Additionally, you also see some output for debugging in order to assist testing of the code. Within production, you would eleminate that lines of code.
An increasing set of samples, you'll find on the subpage "Sample Rules for automation".
Global Permissions

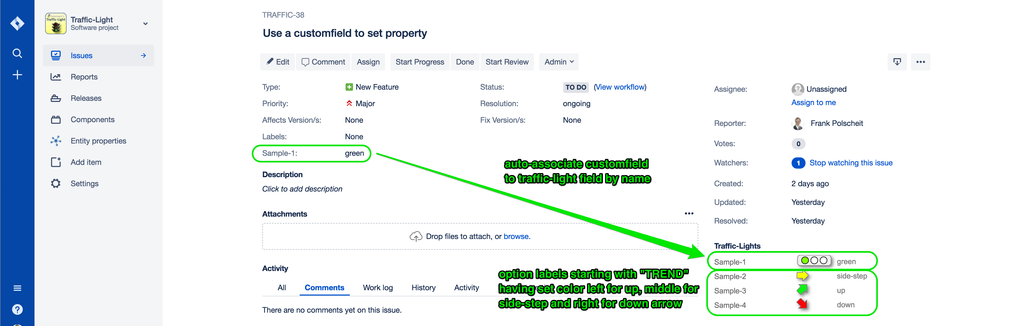
As admin: Optionally associate a customfield with a traffic-light field to set its option (customfield → traffic-light field → customfield)
Create a new custom field and give it the same name like the related traffic-light field in order to auto-associate them. The custom field must be of type "Text Field (single line)" or "Select List (single choice)". In the second case, create its options accordingly to the labels of your related traffic-light. Then put it on your screen associated to the issue operations for EDIT (see Atlassian's documentation on how to configure Jira's "Screen Scheme" and action "Associate an issue operation with a screen" if you are not familiar with that) but not on VIEW to avoid displaying that customfield in addition to the related traffic-light twice.
That auto-associated customfield will always represent the related traffic-light's label:
- you can use the associated customfield to set a traffic-light option by naming it's label (e.g. within Jira automation)
- you can use the associated customfield to represent the traffic-light's options (e.g. for exporting)
Set a traffic-light on the create-issue screen
Put your new customfield on your screen associated to the issue operations for CREATE in addition to EDIT. Setting the customfield value while creating a new issue, it will automatically synchronize/update the auto-associated traffic-light field while displaying that issue.
Update a traffic-light within a workflow post function
If you set the value of that customfield, e.g. by a workflow post function, it will automatically synchronize/update the auto-associated traffic-light field while displaying that issue.
As admin: configure colored trend arrows or other shapes instead of traffic-lights
Switch on the config screen and add a new option by selecting your preferred shape: just click on the dropdown button "shape".
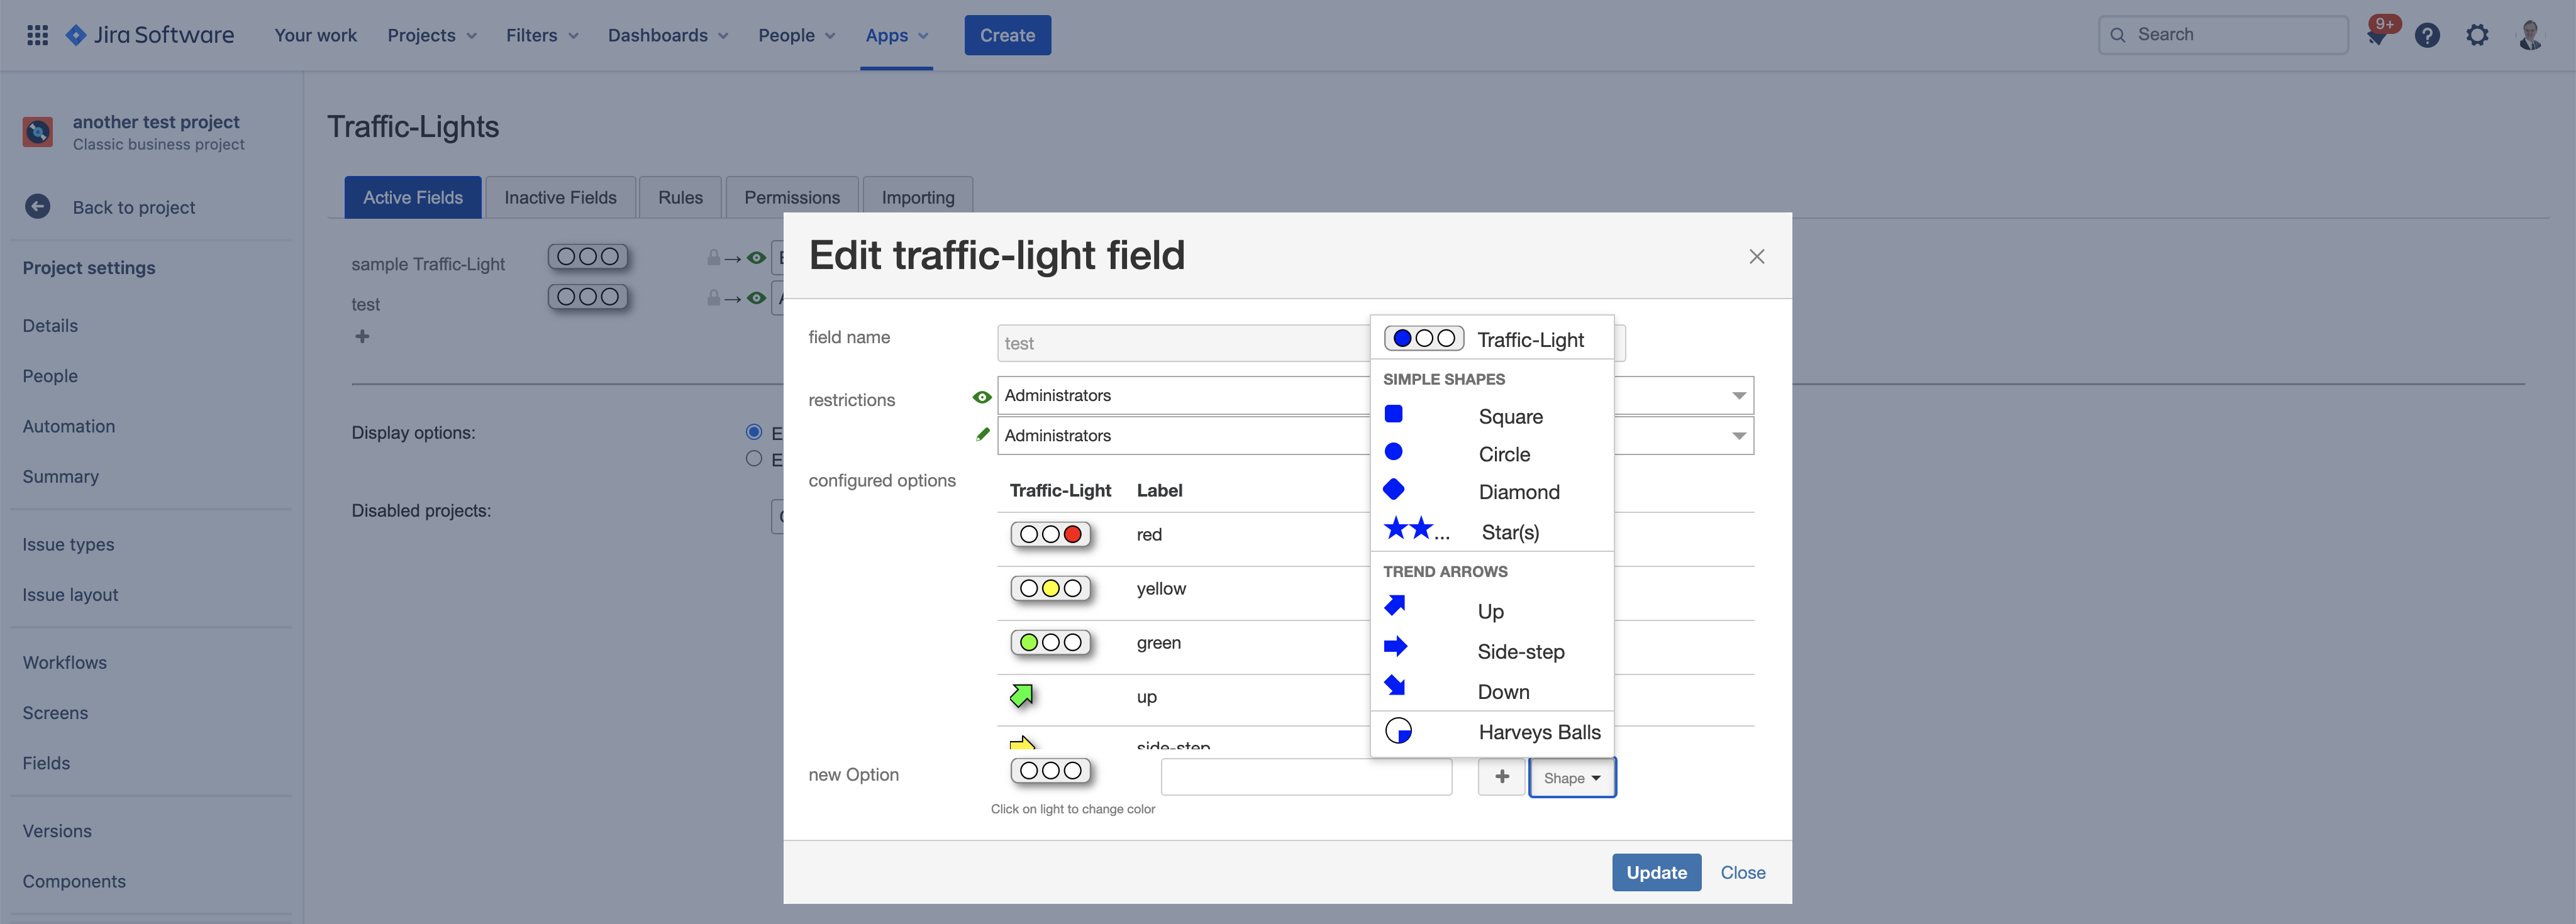
If you have chosen "stars" then you can additionally specify the number of displayed stars with a maximum of 10 stars but generally recommended 5 or less.
If you have chosen "harveys balls" then you can configure the start angle in degree (default = 0 degree) as well as the segments's angle in degree (default = 90 degree). Both have got a range from 0 ... 359 degrees.
For all, you can click on the graphical shape to edit its color.
As admin: modify options or restrictions of an existing traffic-light
In order to modify options like change colors and/or label as well as add additional options, please click on the pencil-icon within the light yellow background.
Your issues' data will not be affected (no migrations or other manipulations of your data) but the next time you want to change a traffic-light field of a concrete issue, you will just see the new configured options only.
As user: Create and configure a new field as traffic-light
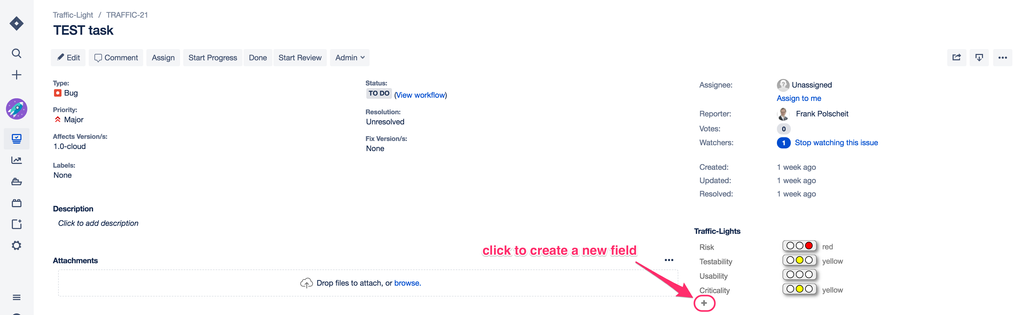
Please move the mouse over the area "Traffic-Lights" on the right side and a plus icon will occur: click on that plus icon to open the field creation dialog:
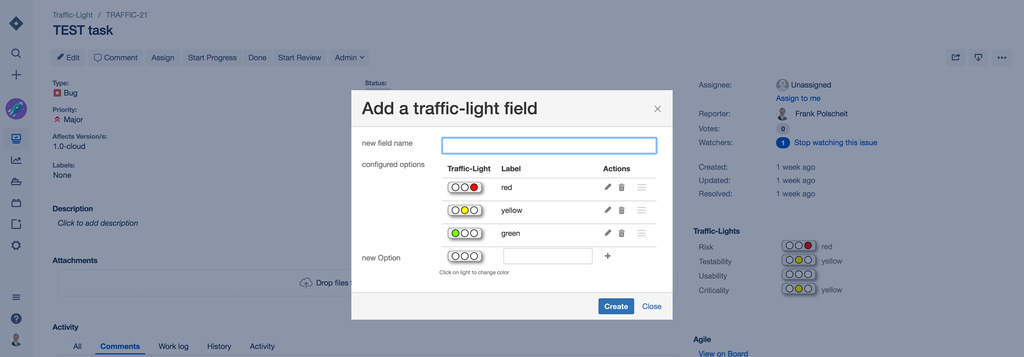
Traffic-light field names must be unique. You can configure as much options as you need (see "new Option"). Click into a light/circle to change its color. You can edit any option (label as well as colored lights) until you hit "Create".
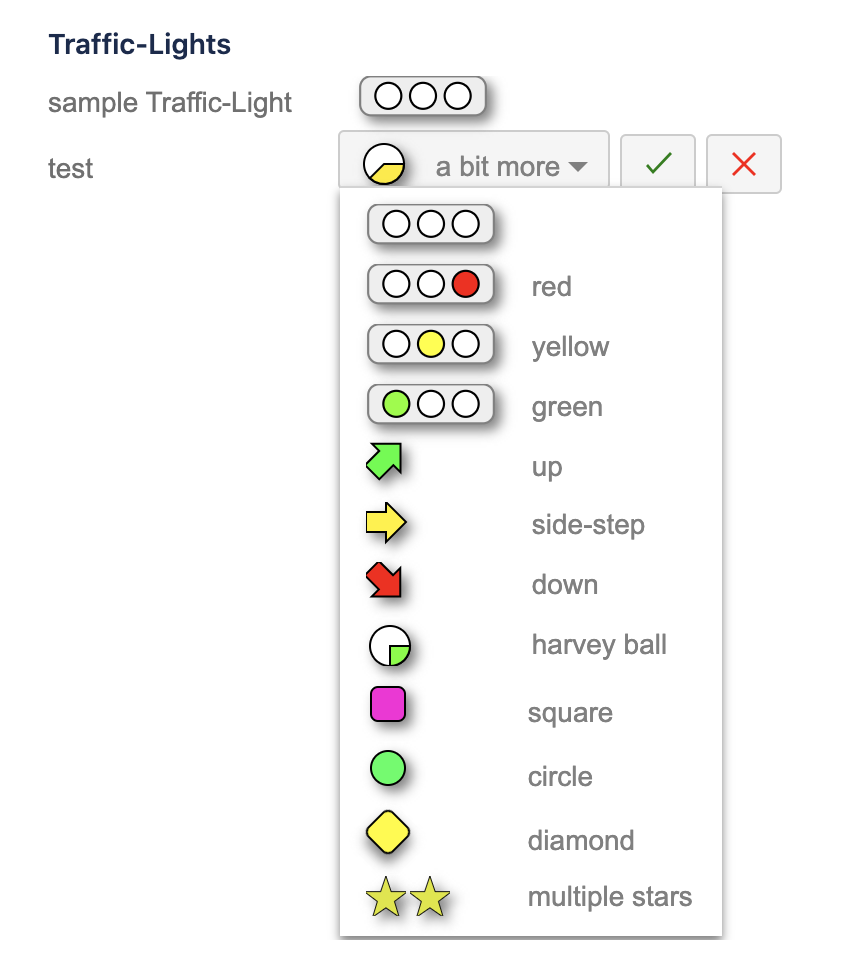
As user: Changing a traffic-light field's option/value

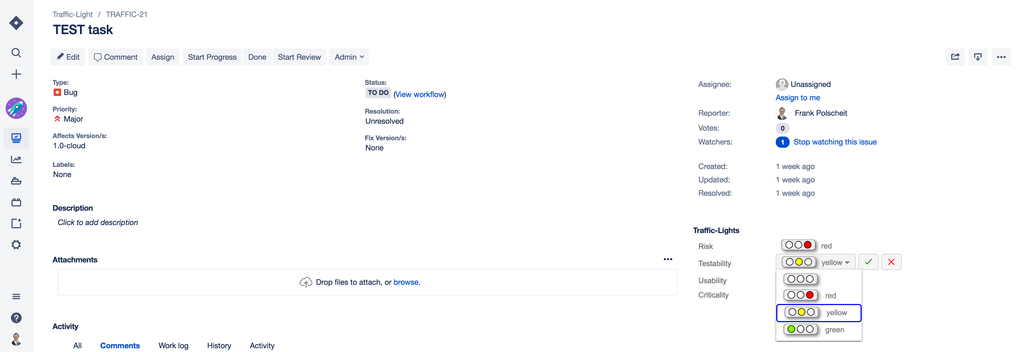
Clicking on the edit-icon, you can select another one out of all configured options:
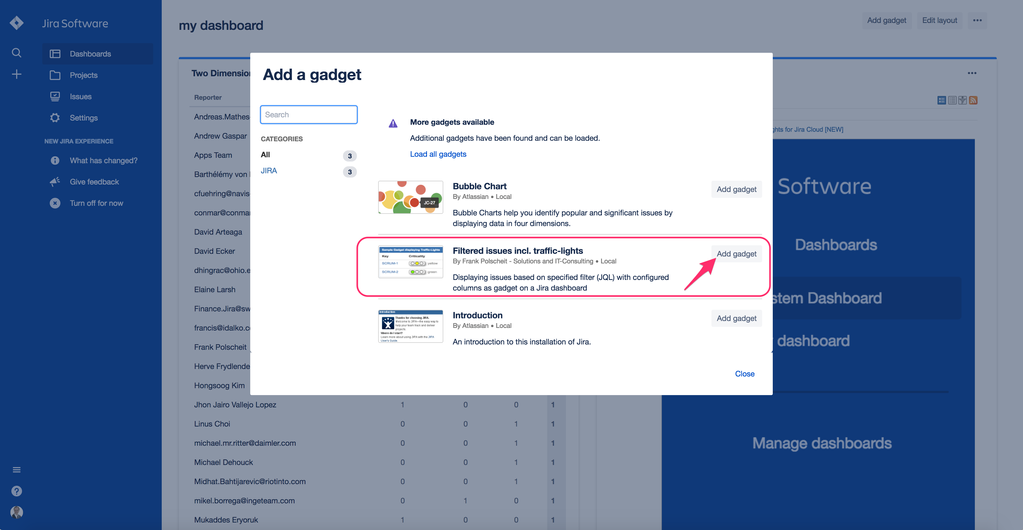
As user: Display filtered issues including traffic-lights as gadget on your dashboard (available since Traffic-Light Cloud version-1.0.2)
Please switch to your dashboard or create a new empty one. Then click on "Add gadget" on the top right and select "Filtered issues incl. traffic-lights" by clicking on "Add gadget" as shown below.
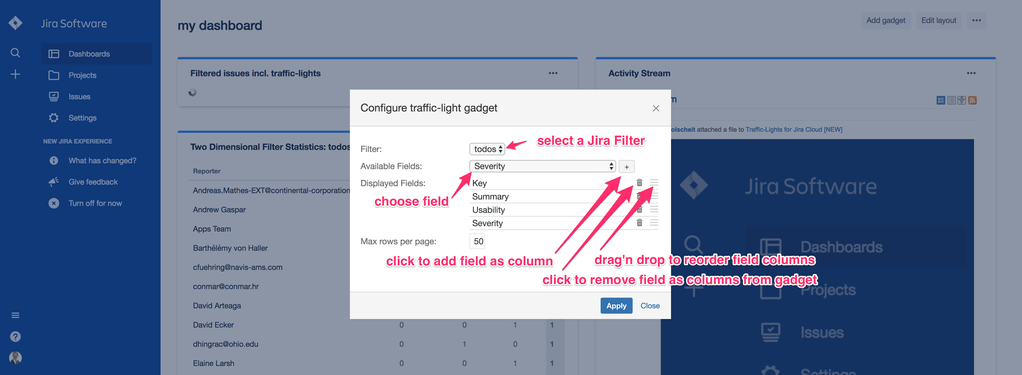
Then, you have to configure the new gadget: please select a suitable Jira filter (if you have none, then please create and save one and come back to your dashboard page afterwards to continue the gadget configuration), add all columns by fields you need and specifiy the max. amount of displayed issues per page on your dashboard.
Now, you have got a new gadget on your Jira dashboard also presenting traffic-lights:

As user: Searching for issues having set a traffic-light field to a certain value
Having created various traffic-light fields with configured options, you can search for issues using a specific syntax as shown within the sample below. The content value in quotes must be the field name in camel case starting in lowercase having concatenated the option label also in camel case. Camel case means, that no blank nor special characters are allowed and each new word begins with a letter in uppercase, the rest in lowercase.

As user: Integrating issues' traffic-lights and other configured fields into a Confluence page

Due to technical and security impacts in the cloud, integrating into Confluence needs a separate Confluence add-on: please read Traffic-Lights for Jira inside Confluence Cloud
As user: Searching for issues via auto-associated customfields
Having configured a customfield of type "string" or "option" named identically as the related traffic-light field, you can also search for that customfield via JQL and you can also put that customfield as new column on your Jira filter result page.