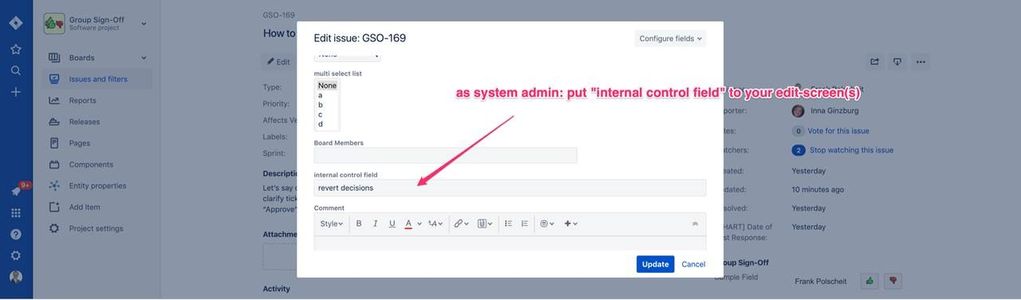
- Create a new custom field of type „text (single line)“ and name it e.g. „internal control field“ and put it on your EDIT screens only (not on VIEW screens).
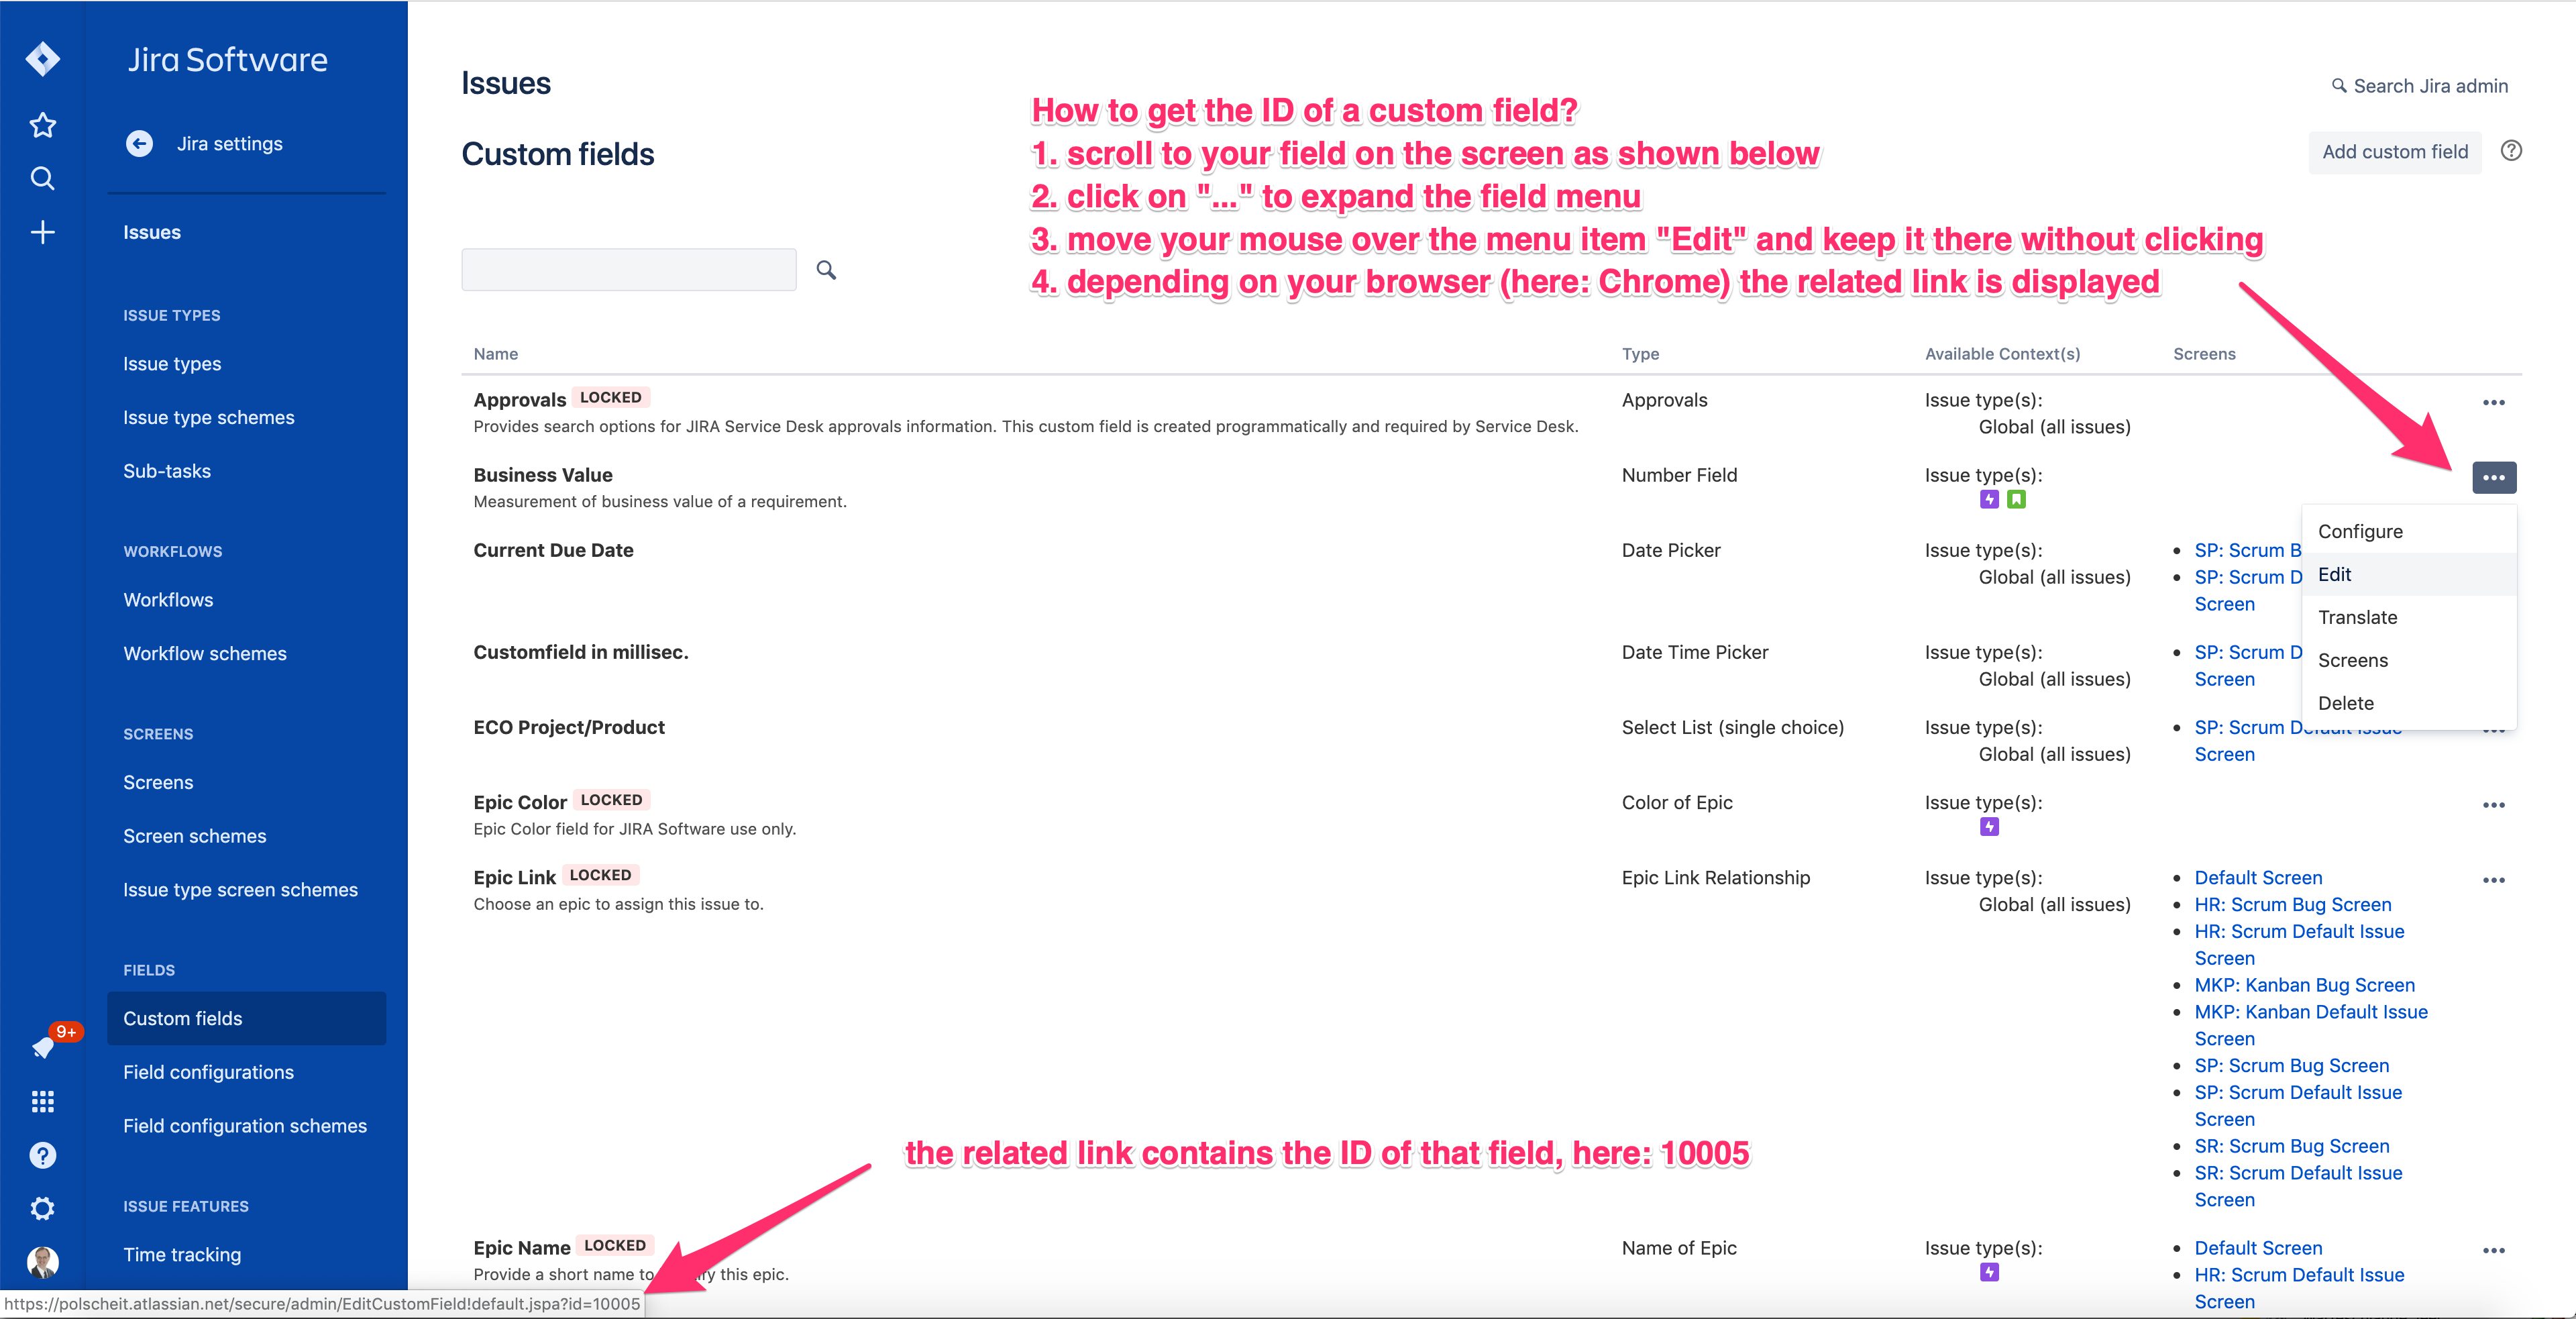
- Get the ID of that new field and remember that for later: switch into Jira's adminstration → Custom Fields and proceed as shown on the screen copy below.
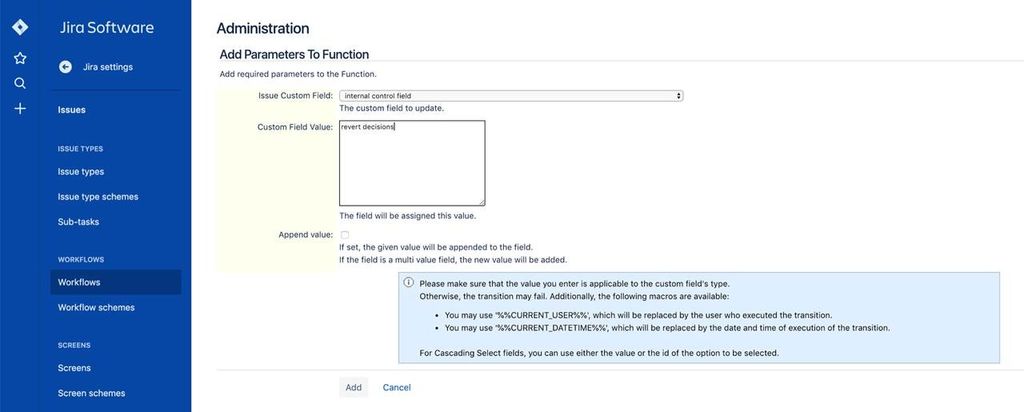
- Modify your workflow and add a transition from state X to X (transition with keeping the status) and add a workflow post function to set the value of the custom field, you have just created:
Below, you see the result: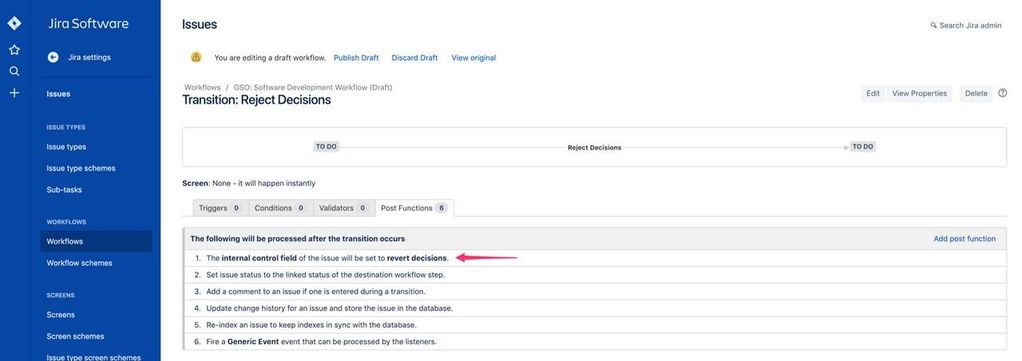
- Switch to Group Sign-Off configuration, open new tab „Rules“ and insert the code as displayed below, but modify the name of your new created field using your correct
field id for "customfield_xyz" having set "xyz" to the ID of your new created field: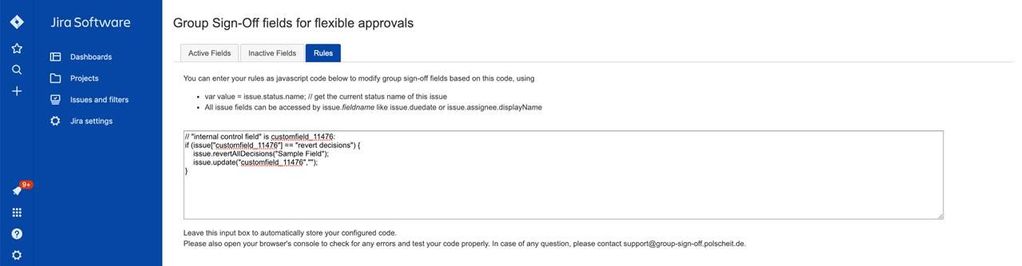
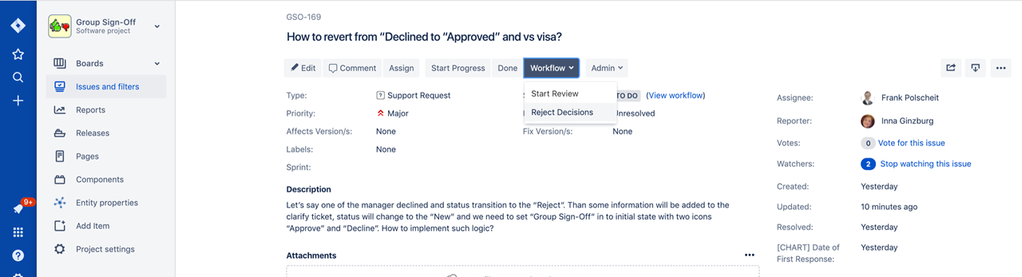
- DONE: now, you can click on transition „Reject Decisions“ and this sets back the field:
Explanation:
Clicking on transition "revert decisions", the configured constant value will be put into that issue's custom-field. Displaying this issue, the configured rule will be executed upfront: if the related custom-field contains this special constant value, all decisions of the specified group sign-off property are reverted via the helper-function. Afterwards, the constant value needs to be reset back to empty ("") in order to omit additional reverts while loading next time.