...
| Name | Outward Description | Inward Description |
|---|---|---|
| Gantt: finish-finish | has to be finished together with | has to be finished together with |
| Gantt: finish-start | has to be done before | has to be done after |
| Gantt: start-finish | earliest end is start of | start is earliest end of |
| Gantt: start-start | has to be started together with | has to be started together with |
Step-by-step guide
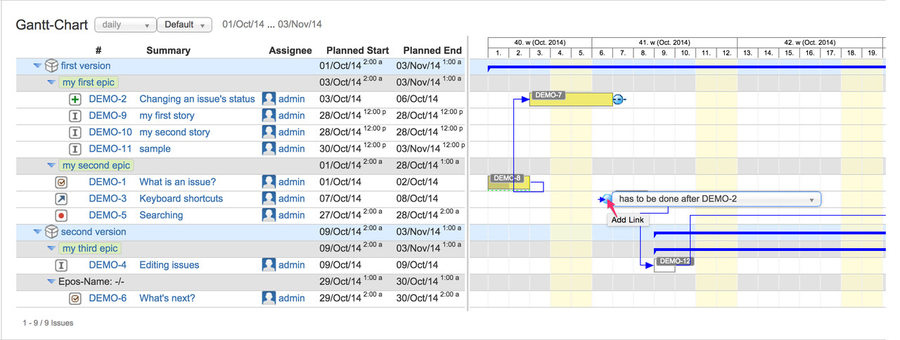
- move the mouse over the Gantt bar of the source issue: a blue bubble will occur on the right having a tooltip "add link"
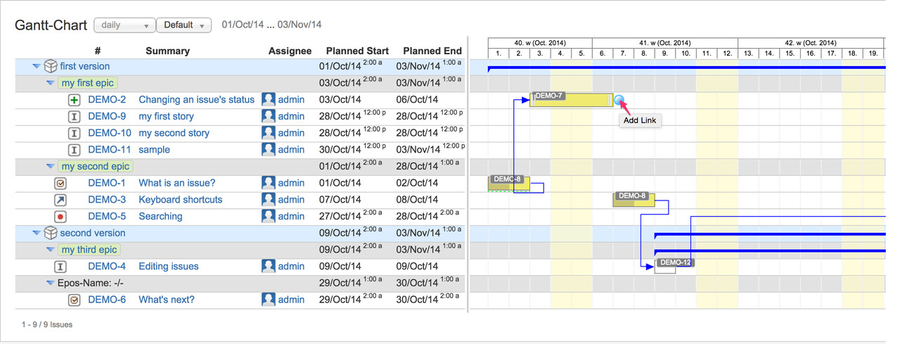
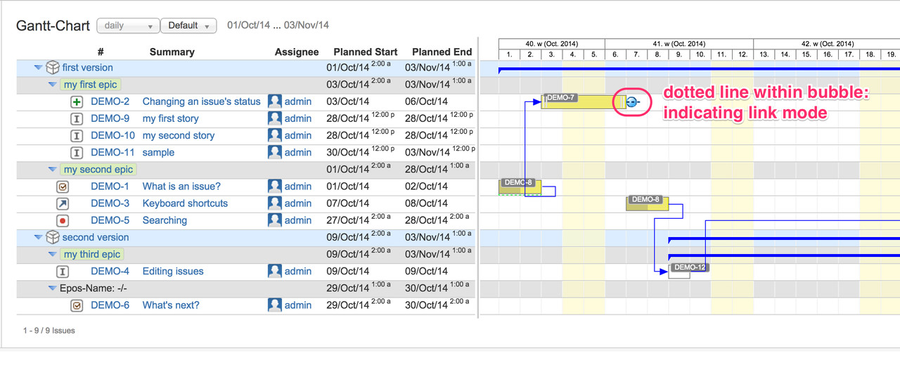
- click on the blue bubble to start issue linking for Gantt-dependency
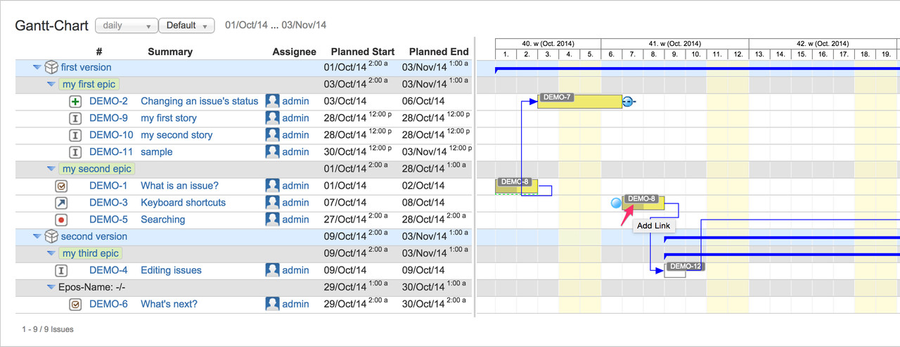
- move mouse over the Gantt bar of the target issue and a blue bubble on the left will occur
- use the default issue link type as displayed on the right hand of the left blue bubble or select your preferred type out of the combo box
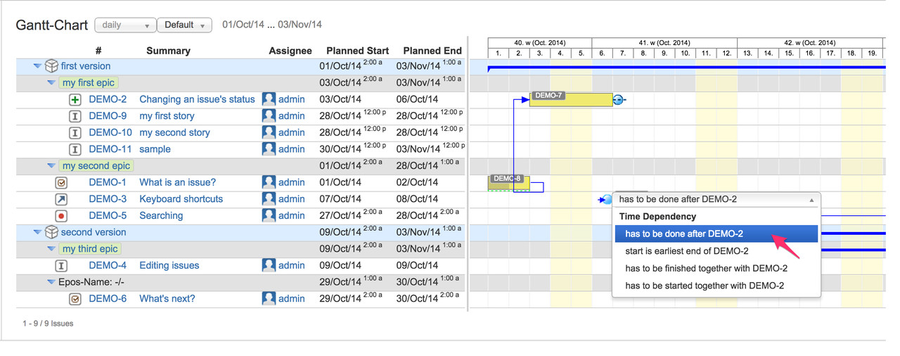
- finally, click on the left blue bubble to link both issues using the selected issue link type
- on the Gantt-Chart both linked issues will be displayed a "connected" using the look and style as defined for the related issue link type
Additionally, depending on the type (Gantt-dependency) the target issue's planning dates will be adjusted if re-scheduling is enabled (default)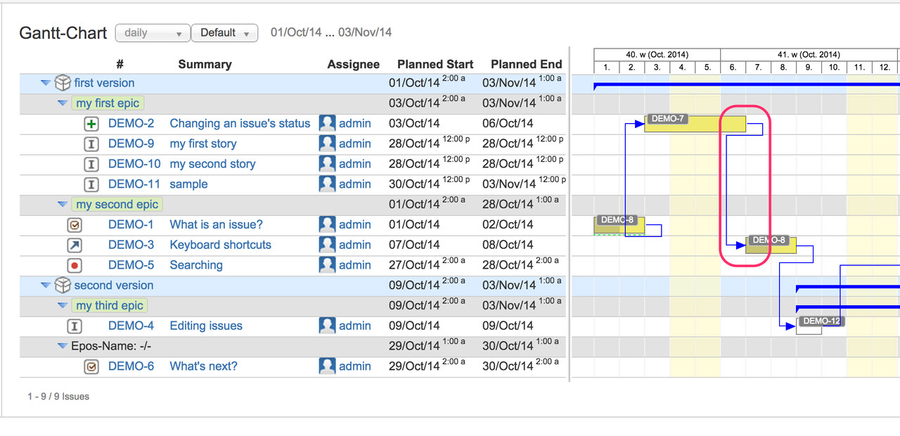
| Info |
|---|
If you use JIRA's standard feature to create links between issues, no automatic re-scheduling will take place, but the issues will be displayed in a linked way using the defined coloring and style. |
Related articles
Filter by label (Content by label)
| Page Properties | ||
|---|---|---|
| ||
|