...
| Name | Outward Description | Inward Description |
|---|---|---|
| Gantt: finish-finish | has to be finished together with | has to be finished together with |
| Gantt: finish-start | has to be done before | has to be done after |
| Gantt: start-finish | earliest end is start of | start is earliest end of |
| Gantt: start-start | has to be started together with | has to be started together with |
Step-by-step guide
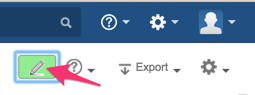
- ensure, that you have enabled edit mode by clicking on the pencil-icon on the top right: a green background indicates active edit-mode.
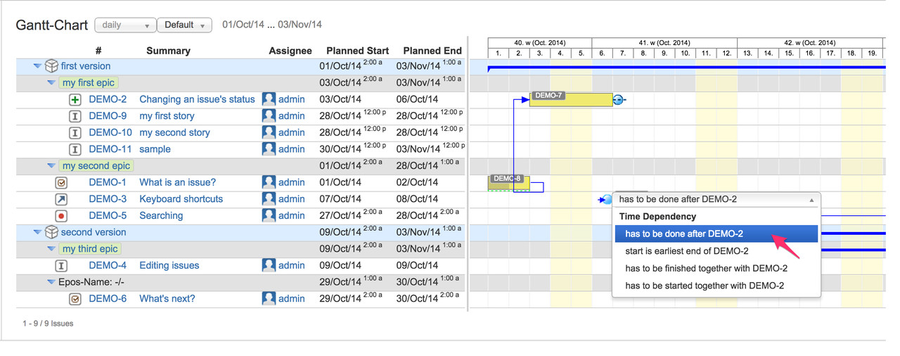
- move the mouse over the Gantt bar of the source issue: a blue bubble will occur on the right having a tooltip "add link"
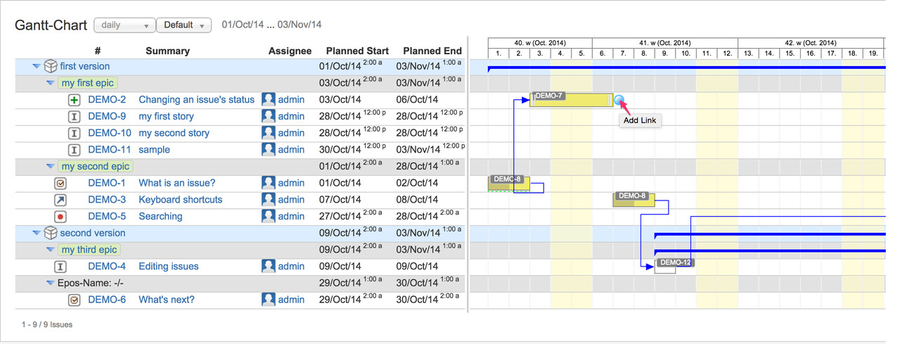
- click on the blue bubble to start issue linking for Gantt-dependency
- move mouse over the Gantt bar of the target issue and a blue bubble on the left will occur.
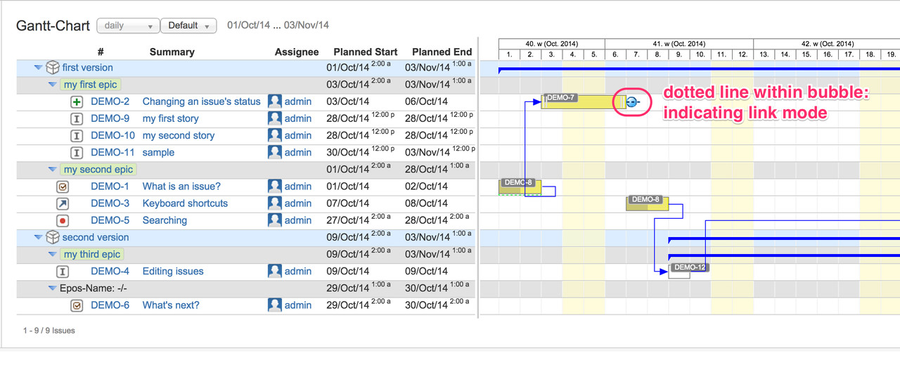
If you move the mouse over that blue bubble without clicking on it, an additional combobox will be displayed to select the link type as shown on the next following screenshot (#4).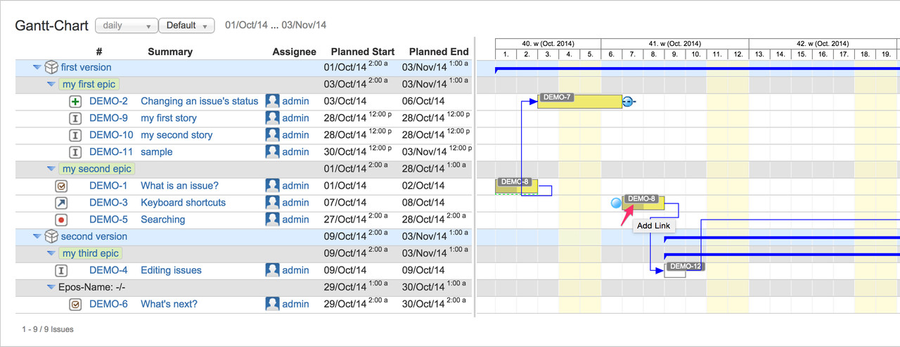
- use the default issue link type as displayed on the right hand of the left blue bubble or select your preferred type out of the combo box
- finally, click on the left blue bubble to link both issues using the selected issue link type
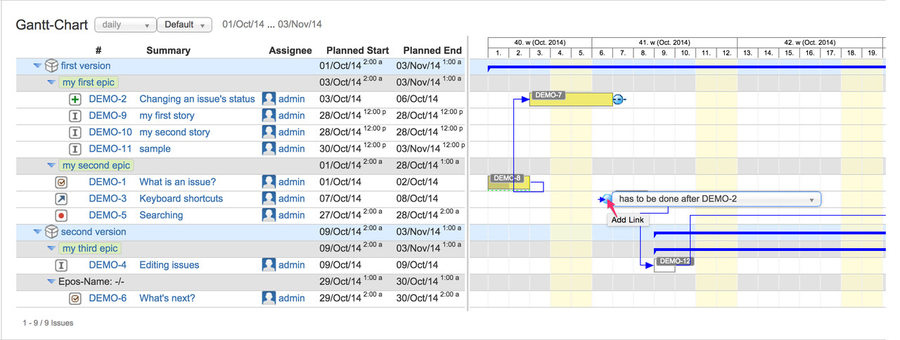
- on the Gantt-Chart both linked issues will be displayed a "connected" using the look and style as defined for the related issue link type
Additionally, depending on the type (Gantt-dependency) the target issue's planning dates will be adjusted if re-scheduling is enabled (default)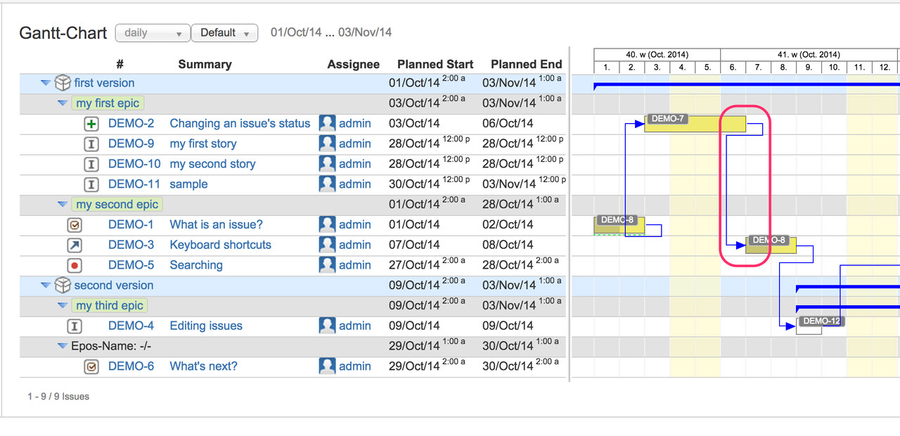
...